Skip to documentation

Evidence → insights

Bring customer evidence into Discovery

Choose the simplest way to bring evidence into Discovery: paste or upload it, connect a source, or send it with the API. Then review the import receipt and curate what Zentrik found.

Use this page to answer three questions:

  1. How should the data get here? Start with a manual import, a connector, a schedule, or the API.
  2. What is the data? Import raw evidence as a signal, trusted findings as insights, or requests and bets as ideas.
  3. What happens next? Follow the import result or receipt to the records Zentrik created, then link the useful evidence to the work it informs.

This page covers Discovery evidence. For PRDs, decision logs, and other product knowledge, use Workspace context instead.

Discovery import flow showing paste or upload content types for any text.

Paste and files are one way in; connected tools use the same signal → insight pipeline after you pick records.

Choose a path

The source and the job you need to do determine the shortest path.

Try one record first

For a first test, open Discovery → New → Import data… → Paste text. Import one real call note, ticket, review, or research excerpt and inspect the resulting Signal, extracted Evidence, and related Insights.

This gives you a baseline before you configure a connector or automate a source.

Paste or upload

Use manual import when the evidence is already on your computer or you are testing a small batch.

Upload a file

In Discovery, select New → Import data… → Upload file. Choose Upload file for raw customer evidence. Choose Curated findings or Requests & bets only when the file already contains finished records of that type.

Choose the mode that matches your file:

ModeUse it whenResult
RowsEach CSV/XLSX row is a separate piece of evidence.One signal per row; you map columns such as title, date, product, account, and evidence text.
Whole fileThe report, export, or document should stay together.One signal for the file; no column mapping. This is usually the clearest choice for DOCX, PDF, TXT, Markdown, and HTML.

If you are unsure, choose Rows only when each row can stand on its own. Otherwise, choose Whole file.

  1. Add your file. You can add multiple transcript files when each file represents one call or meeting.
  2. Choose a Signal type—usually Customer feedback for rows or Discovery report for a whole file. Add Product or a Global account when the same context applies to the entire upload.
  3. Select Preview. Nothing is created yet. For Rows, check the selected product, account, title, date, evidence, and source-link columns. The preview groups records as:
    • Ready: will become a signal.
    • Review: needs a decision, usually because an account value does not match an existing workspace account.
    • Skipped: will not become a signal.
  4. Resolve every account review, then select Import signals. You can map an unmatched value to an existing account, import it without an account, apply the global account, or skip the row. Until the review is resolved, the import action remains blocked.

Zentrik links rows to existing workspace accounts; it does not create accounts during an import. Imported signals retain source details such as the filename, sheet or row, dates, and URLs.

Paste text

Use Paste text for notes, transcripts, tickets, reviews, survey responses, or reports.

Limits

Files can be up to 50 MB each. A batch can include up to 100 files, and a Rows import can create up to 500 signals.

Animated walkthrough of choosing Upload file, selecting Rows, reviewing the row preview, and switching to Whole file.

Watch the path from New to the preview: Rows creates one signal per row, while Whole file creates one signal without column mapping.

Connect a source

Use a connector when the evidence already lives in a supported system. Connect it under Settings → Integrations, then choose the records to import from Discovery.

SourceImportsCreates
Zoom, Microsoft Teams, Gong, Fireflies, Granola, FathomCalls, meeting transcripts, or notesSignals
ZendeskSupport tickets and customer issuesSignals
PendoNPS responses, comments, and account contextNPS records; optional signals from useful comments
Jira, Linear, Aha!Issues, requests, and product ideasSignals, insights, or ideas, depending on the source and mapping
SalesforceCases, opportunities, and accountsSignals, insights, or ideas
AirtableRequirements, roadmaps, and tracked recordsSignals or ideas

Other evidence paths are available through Slack thread capture and workspace email intake. Each source guide explains its permissions, filters, and mapping rules.

Set up a saved import

Use a one-time import when you want to choose particular records now. Use a saved import when Zentrik should reuse the same source boundary on demand or on a schedule.

  1. Connect the source under Settings → Integrations.
  2. Open Settings → Integrations → Imports, select New saved import, and define what can be imported and where it belongs.
  3. Select Create draft. A source preview is an optional spot check while you refine the rules.
  4. Select Test draft. Testing does not import records or change what the active import has already processed.
  5. After a successful test, select Activate tested draft. Keep it On demand or choose an interval, then review results under Runs or Imports → History.

Changes to an active import stay in a new draft. The active version keeps running until the changed draft is tested and activated.

Animated saved import setup showing a draft being tested without importing records, activated, and scheduled every 24 hours.

Test the draft first, activate the tested revision, then choose whether the active import runs on demand or on an interval.

Automate with the API

Use the API when Zentrik does not have a connector for your source or you control the import workflow yourself.

For API imports, keep a stable externalId, source date, product or account identifiers, and a reviewer-facing sourceLinks URL when available.

If a source is not listed and you prefer a native connection, contact us. If you already control its API or export, the technical guides can get it into the same Discovery pipeline.

Choose what to create

Choose the record type that matches the material, not the system it came from.

  • Signal: raw evidence Zentrik should read, such as a transcript, ticket, review, survey response, or note. This is the default when you are unsure.
  • Insight: a finding your team has already written or approved and wants to organize or link.
  • Idea: a request, solution bet, feature, backlog candidate, or roadmap item the team may build.

Raw evidence should usually enter as a Signal because it keeps the original text and source context available while Zentrik extracts Evidence and connects it to related Insights. Use Idea when the item is already framed as a possible product change.

After import

For records imported into Discovery, every path converges in the same review workflow. Use the receipt or source-specific import result to move from ingestion to review, then curate the records before they shape product work.

What Zentrik does

For Signal imports, Zentrik stores the source text as a Signal, processes it into source-backed Evidence, and connects that Evidence to related entities, including Insights. Insight and Idea imports create the chosen record directly. Pendo NPS history remains account context; useful comments can become Signals. Source links and imported metadata stay with the record when the source provides them. Longer runs can continue in the background after the dialog closes.

For raw input, the same Signal → Evidence → Insight path is used for pasted text, files, connectors, and API imports. Results vary with the source: a rich customer conversation may produce several Evidence items; a short note may produce one or none.

Progress UI while Zentrik processes imported text into insights.

Processing often runs asynchronously. Check status on the signal until candidates and links are ready.

Review the receipt

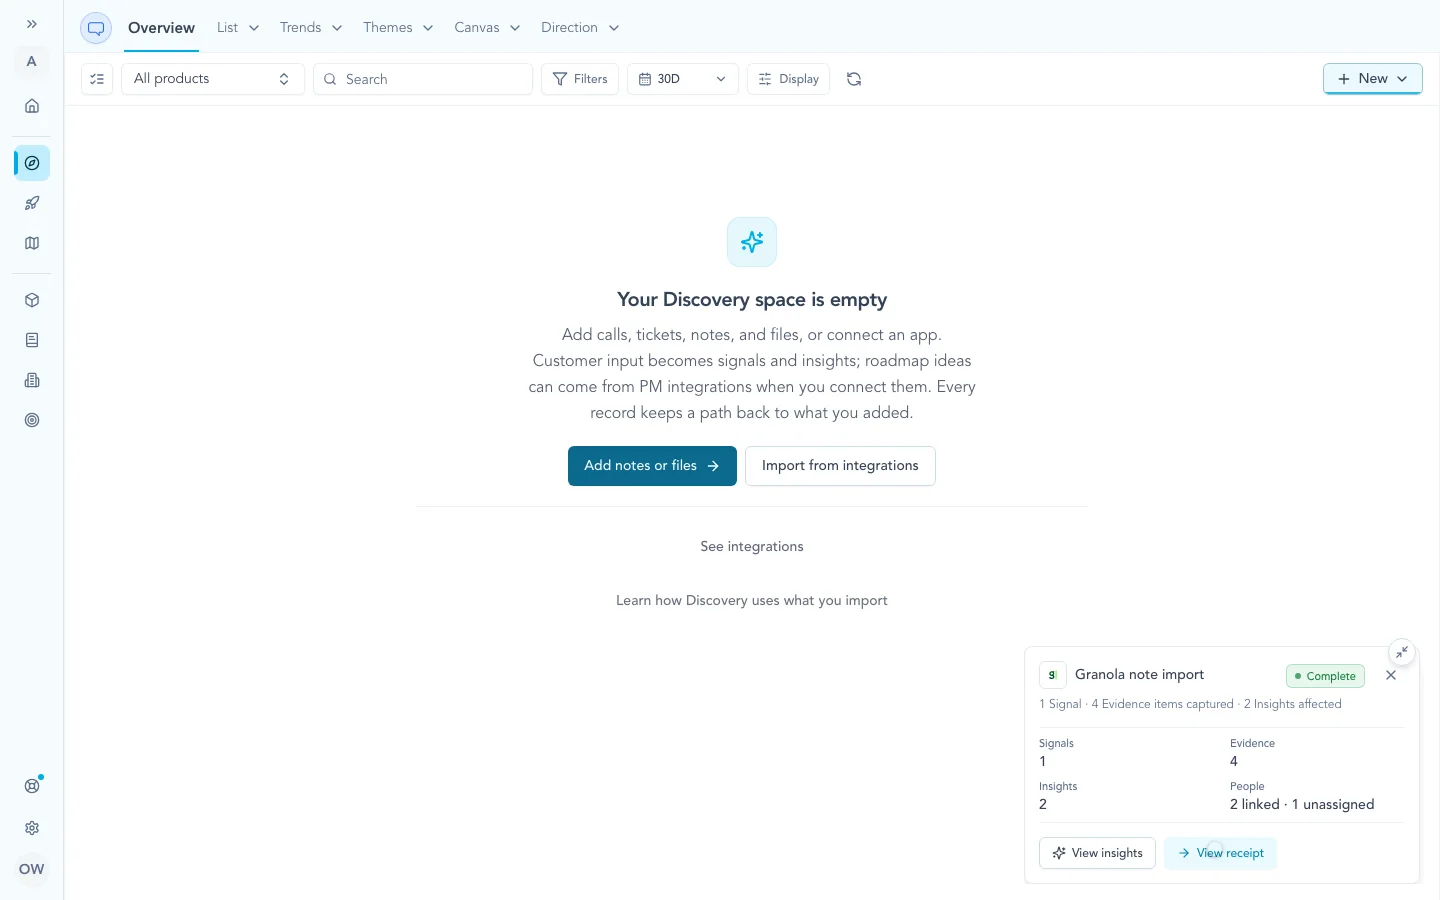
When a Discovery run shows a background receipt, it reports what the run reviewed, what it created, and what needs attention. Use its links to open the right destination:

  • Signals for source-backed evidence and its original context.
  • Evidence for the atomic findings extracted from Signals and connected to related work.
  • Insights for patterns synthesized from related Evidence.
  • Ideas for imported requests, bets, or roadmap candidates.

Open the signal when you need to verify the text that arrived. For Pendo, use the integration result to distinguish NPS records from comment signals. If processing fails or the result looks thin, check the source body and status before retrying.

Insight detail showing linked transcript and signal evidence.

Insights stay linked to signals so new quotes attach to the same learning as you merge and edit.

Continue the work

Curate the result by editing, merging, splitting, or linking it to existing evidence. Then move from evidence to action with Insights → opportunities and From customer evidence to initiatives.

For rollups and stable labels, use Taxonomy & themes. Keep PRDs, decision logs, and other living product documents in Workspace context.

For workspace admins

  • Paste and uploads use the content the user selects. Connector credentials are managed under Settings → Integrations.
  • Connected imports are normally user-selected. Where supported, admins can configure a schedule, source filters, destination, or mapping on the integration page.
  • Access and scope vary by provider. The connector guide is the source of truth for permissions and what Zentrik can see.
  • For signal imports, processing is server-side. Receipts, signal status, and item-level errors keep a run reviewable after it starts; other connectors expose their own import result.

Troubleshooting

Check these steps against what you see in your workspace. If something differs, note your workspace name and the screen, then contact us.

Should we use manual import, a connector, or the API?

Use manual import for a first run or a small batch. Use a connector when the source is supported. Use the API when the source is custom or the import needs repeatable automation.

Processing seems stuck

Open the signal, source report, or background receipt and check its status and error. Large inputs can take longer. If the status never completes, contact us with the workspace and source.

A signal is missing context or insights

Confirm that the imported body contains the full transcript, ticket, or feedback text rather than metadata alone. Add product or account context and a source link when available. For very large files, split the input and retry.

Continue from here

Did this guide answer your question?

Your response helps us prioritize missing or unclear documentation.

Still stuck?

Send your question to Zentrik support. This guide will be included automatically.

Ask Zentrik support